Say I LUV U with Polymer Clay Candy Hearts
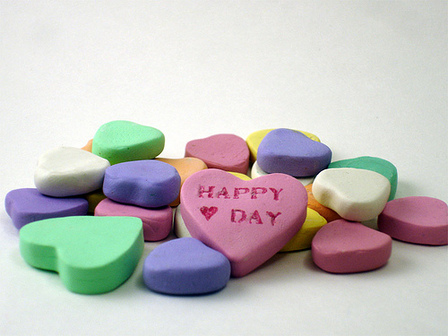 Looking for the perfect candy heart saying for your sweetheart this Valentine's Day? Don't waste time searching through candy bags! Instead, use polymer clay and image transfers to make your own customized conversation hearts.
Materials
- Polymer Clay: Small amounts of several pastel colors. Here's the formulas I used to match the colors of the Necco brand candy hearts. (White refers to a 2:1 mix of Premo white and UltraLight; all other colors are by Premo.)

- Yellow heart: 1 part Cadmium Yellow; 4 parts white
- Orange heart: 1 part Orange; 7 parts white
- Green heart: 1 part Green; 7 parts white
- Pink heart: 1 part Fuchsia; 1/4 part Cadmium Yellow; 5 parts white
- Purple heart: 1 part Purple; 1/2 part UltraMarine Blue; 6 parts white
- Tools: Scissors, needle tool or toothpick, stiff-bristled paintbrush, clay knife
- Color laser printer or color copier
- Rubbing alcohol
- Corn starch or baby powder
- Candy heart (optional)
- Amazing Mold Putty (optional)
Instructions
-
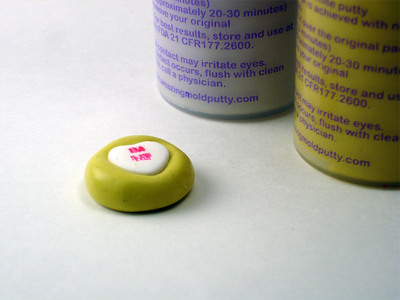
If you have one of the real candies, you can use this to make a mold (follow my button mold instructions). Note: Mold the blank side of the heart, unless you actually want to copy the texture from the words. Allow the mold to set.
To use the mold, press a 1/4 teaspoon ball of clay into the mold. Use a scraper tool or a clay knife to remove excess clay from the back. Pop the heart out and correct any molding flaws.
Don't want to make a mold? You can easily hand-form the heart based on a real candy heart (or a photo of one).
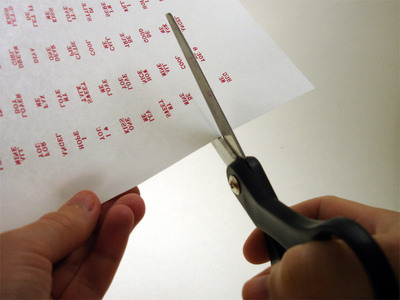
Use a color laser printer or color copier to print the words you'll transfer onto the hearts. Cut the transfer as close to the letters as possible. Here's a few phrases you can use for your hearts [PDF, JPG].
If you're creating your own transfers, I recommend using the "Stamp Act" font, 8 pt size, with kerning set to 1.5 pt — you can get this font free from Harold's Fonts. Be sure to select mirror image if you're printing your own.
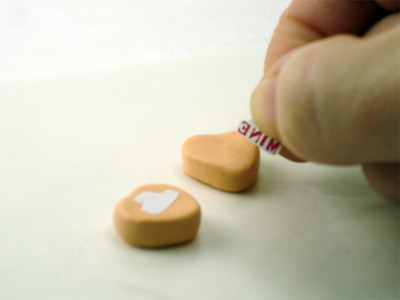
- Lightly press the transfer sheet, printed side down, onto the clay. Don't press down too hard as this will cause a line at the paper's edge.
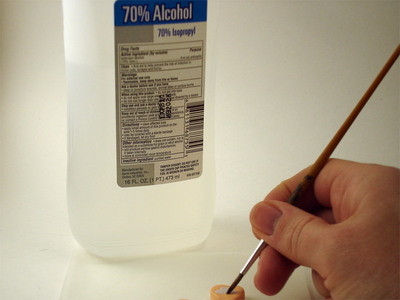
Use a soft paintbrush to paint a small amount of rubbing alcohol onto the back of the paper. Be careful not to move the paper, since this can cause smudging. Let the alcohol dry completely (til you can no longer see the letters through the paper), then repeat this step twice.
If you prefer, you can leave the transfer sitting overnight instead of using rubbing alcohol.
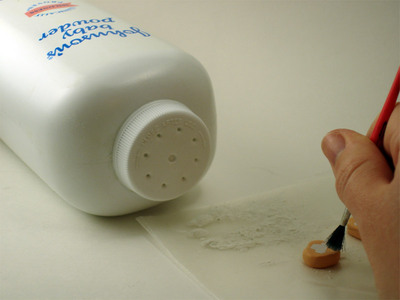
- With the transfer still in place, load a stiff-bristled paintbrush with corn starch or baby powder. Use a pouncing motion to tap the front (around the transfer) and on the sides and back. This leaves a light chalky residue, similar to that on the real candy hearts.
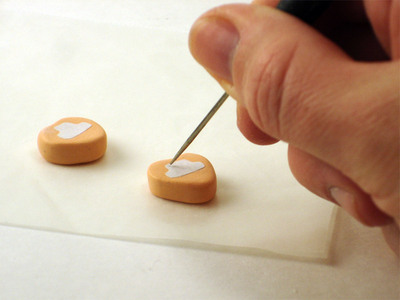
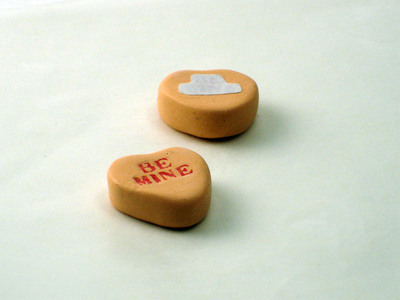
Brush the transfer lightly with rubbing alcohol once more. You should be able to see the letters through the paper. Use a toothpick or needle tool to trace the letters, creating an indentation in the clay. This step often makes it easier to remove the paper as well: as you're tracing the letters, you may see an edge start to stick up. Once you're done tracing, use tweezers or a needle tool to coax the paper up the rest of the way. Your message should be transferred onto the clay.
Be careful not to touch the transferred letters, as the ink is still wet and will easily smear. If you're not in a big hurry, I'd encourage you to let this sit a few hours til the ink dries. That'll help prevent smearing. But if you're in a hurry, continue on and just be really careful not to touch the ink.
- There may be a ridge where the edge of the paper was. Decide how much this bothers you. You can use the rounded end of a paintbrush (or a variety of other tools) to help smooth this out — but be careful not to smear the ink. You can also add some texture and baby powder to this area if it needs it — but it's much easier to do this if you let the ink dry first.
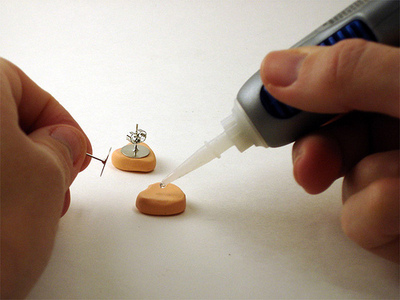
- Once you're happy with the heart, cure it in the oven according to the manufacturer's recommended time and temperature. If desired, use Loctite Super Glue Control Gel to attach earring backs after the clay has cooled.
More Candy Hearts Info
Use these links to find out more about the candy hearts & their history — plus find sayings to use for your own hearts.- NECCO Sweehearts: Official site from the candy's maker.
- History of Candy Hearts: Includes info on how new phrases are selected, plus the new phrase lists for the past few years.
Polymer clay candy hearts are fun & easy to make. Not only that, but the polymer clay version is much more durable than the candies themselves — perhaps as durable as your love!


Comments
Every time I see Neccos I think of my Mom, she loved those!
Posted by: Michelle at Scribbit | February 13, 2008 4:23 PM
Is this transfer paper or regular computer paper??
Posted by: Denise | February 25, 2008 1:27 PM
Denise, I'm using regular computer paper with a laser printer. If you have an inkjet, there are some transfer papers that work -- but I'm currently inkjet-less, so I can't give you much guidance there. Good luck!
Posted by: Angela Mabray | February 25, 2008 6:06 PM
Hi Angela, so glad we finally got in touch. I have been on your site over 2hrs, enjoying it so much. After I found out I had won the putty prize (yay) I went to your site and read everything on the mold kit. Can't wait to get it. I think I am gonna luv it! Vicky
Posted by: VICKY EDWARDS | March 1, 2008 12:43 PM
Angela, I just wanted to say I love this tutorial, I am planning on making some candy hearts for valentines day. I was wondering if I culd make a mold out of polymer clay before hand insted of buying the amazing mold putty?
Posted by: Kailey Smith | January 22, 2009 2:40 PM
Thanks, Kailey! I mentioned the Amazing Mold Putty because it's my favorite way of molding things, but you certainly can use polymer clay to make your mold. The main advantage (in my mind) of mold putty over polymer clay is how well it captures detail -- and you really don't need a detailed mold for this project. I also like the mold putty's flexibility when de-molding, but again, that shouldn't be a big deal for a simple shape like this.
Good luck with your candy hearts!
Posted by: Angela Mabray | January 23, 2009 3:02 PM
Fantastic tutorial! Just what I had been hoping to find. Thanks so much!
Posted by: Nature Assassin | January 3, 2010 10:11 AM
This is a great tutorial, thank you! I wanted to point out that there is a faster way to do the ink transfer. Once you have the messages printed on transfer paper and cut to size, place a thin coat of TLS on the clay heart where you want the message to go. Then put the transfer paper down on the TLS, ink side down. Bake for about 5-6 minutes, then remove from oven and taken the transfer paper off the clay (carefully!) The image of the messages should remain on the clay. Bake for another 6-7 minutes or until the clay is fully cured.
Posted by: Jen | September 8, 2010 12:44 PM
Thanks for the comment, Jen, and for sharing your transfer technique. There are many variables that affect transfer success, so I'm always happy when people find a process that works well for them. In fact, a variation of the method you described (minus the TLS) is the one I usually use nowadays because I've found it to be easy and reliable.
But it can be handy to know the pros and cons of various other transfer techniques, too. On this particular project, for example, the method I described allows some tweaks -- texture and powder after the transfer dries -- that would not be possible using the method you described, since the clay would already be partially baked before the transfer paper was removed. But if you're in a hurry, losing that texture might be a trade-off you're willing to make.
Posted by: Angela Mabray | September 12, 2010 11:43 PM
This is a great project! I made earrings for my granddaughters. Attached 2 hearts together to make them dangles. They love them and were so impressed that I made them. Thanks for a fun tutorial.
Posted by: Cindy K | February 3, 2011 4:47 PM
Thank you so much for this amaizing tut. I've been searching forever, only I would like to make edible candy hearts. Where do you think I could find a recipe for this?
Posted by: Anreheth Jacobz | August 5, 2011 3:46 AM