
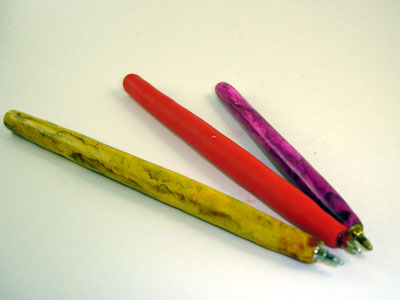
Polymer Clay Pens: BBQ Style!
 Okay, you've covered Bic and Papermate pens, and you've covered pen kits. What's next?
What if you could ignore that whole "oven-safe" thing & convert every pen in your house to polymer clay?
I came across this bamboo skewer pen idea on Glass Attic while I was getting ready to teach my guild's pen lesson. And while a (no-longer-there) pencil tutorial from the British Polymer Clay Guild was helpful in figuring out how to do it, I still had to do a little trial and error -- so I wanted to share my experiences here.
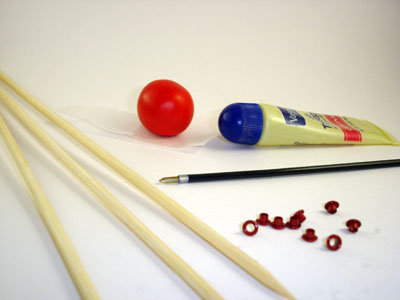 Materials
- Get a pen refill. No need to buy a refill -- any pen's innards will work.Ya know that dentist you stopped going to 8 months ago, but you still have his (non-oven-safe) pen sitting on your desk? Yeah, that's a good one to use.
- You also need a bamboo skewer -- the kind like you'd use for skewering veggies for the BBQ grill. I got mine at a local grocery store, 100 skewers for a buck.
- A metal eyelet (like the eyelets scrapbookers use)
- 1/4 package of polymer clay
- Corn starch, baby powder, vaseline OR another type of release agent
- Roll the clay into a ball.
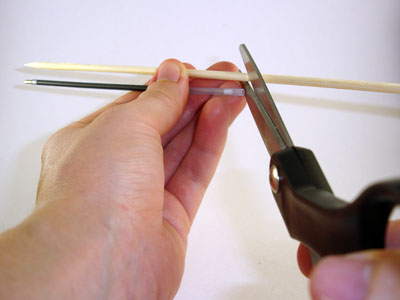
 Cut your bamboo skewer to the same length as the pen refill. I usually use my scissors to score the skewer, then break it at that point.
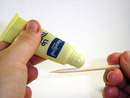 Cover the skewer with a release agent -- corn starch/baby powder or vaseline work well for me
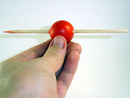 Pierce the clay ball with the skewer, and move the ball til it's about in the middle (lengthwise) of the skewer.
 Start rolling out the clay ball. If it separates from the skewer, firmly press it back in place. Continue rolling til it's the same length as the skewer.
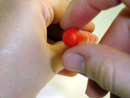 Close off one end of the skewer.
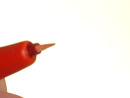 Press the top/wide edge of the eyelet up against the other end of the clay to make an impression. This impression will help it hold when we glue it later.
- Bake the pen on the skewer. (Metal eyelets can be baked in place.)
 Let the pen cool for 5-10 minutes. You want the clay to still be warm and flexible, but not so hot that it burns your fingers. (An oven mitt may help.) Pop the eyelet off and set it aside. Now grasp the skewer with nylon-tipped pliers. While holding the skewer, pull and twist the polymer clay end til it comes off of the skewer. If it's giving you trouble, reheating the clay for a few minutes might help. If you absolutely can't get the skewer out, you can slit the side of the pen and use TLS or super glue to fix the slit.
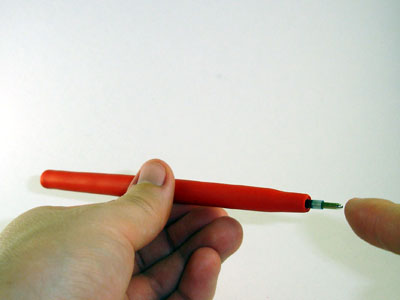
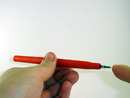 Once the clay is cool, slide the pen refill into the clay sheath. Make sure a sufficient amount of the pen is sticking out so you can write with it -- but not so much that it looks funny or makes it difficult to write.
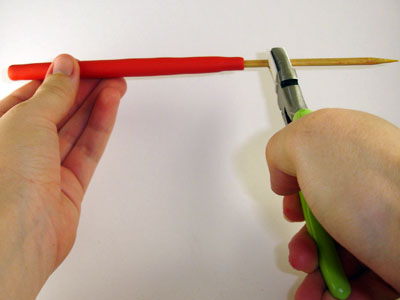
- If the refill is sticking out too far, most pen refills can be trimmed slightly with scissors. Just don't cut into the ink!
- If the barrel's too long for the refill, you may be able to use a craft knife to trim some clay off the tip edge of your pen.
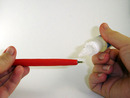 Add super glue to the wide/top edge of the eyelet, then slide it over the pen tip so it adheres to the clay edge. If you use a light enough touch with the glue, you may be able to replace the refill later... but as easy as these are to make, it's not a big deal if you have to make another!


I think these pens are fun to make -- & adding the eyelet gives it a little touch of class. Granted, these pens are a little more flexible than your average pen, so that may take a bit of getting used to. But isn't that an acceptable trade-off for having a way to cover every last pen in your house with polymer clay? <g>
Enjoy!

Comments
where do you get the pen tips from ?
Posted by: Burcu | May 17, 2009 4:37 AM
Hi Burcu. If you're referring to the writing part itself, it's just a pen refill. You can pull it out of another (unattractive) pen if you have one you're not using, or you can buy pen refills at most office supply stores. If you're referring to the eyelet portion, those are available in the scrapbooking section of most craft supply stores. Hope that helps!
Posted by: Angela Mabray | May 21, 2009 2:23 PM
Great idea and a fun activity for kids, you know with this that you will own a truly unique pen! Although I assume drying them in the oven would be a problem with the ink.
Posted by: Thomas Montblanc | November 2, 2009 3:10 AM
Definitely makes for unique pens. Be sure to follow the instructions, though -- don't put the ink in the oven. That could create a big mess!
Posted by: Angela Mabray | November 18, 2009 10:56 AM
I was wondering about the thickness of the skewer, I bought 100 skinny skewer's and it isn't wide enough like the innards. Do you use a larger skewer?
Posted by: Krystal | November 29, 2011 3:44 PM
Krystal: Sorry, but I don't know what diameter the skewers were. I *think* I got mine at a local grocery store, probably a generic brand, but I don't have any left to look it up. You might check if your hardware store has any skewers/dowels that might be the right size. Good luck!
Posted by: Angela M. | November 29, 2011 10:59 PM