
How to Make a Pasta Machine Cheat Sheet

If you've ever tried to give someone directions for how you made a polymer clay project, you probably ran into that question: "What pasta machine setting did you use?"
It's not an easy question to answer. First of all, various pasta machine brands have different settings.
- Some have #1 as the thickest setting.
- Some have #1 as the thinnest setting.
- Some have 9 settings.
- Some only have 6. (Is my Atlas 150 the only one that just has 6, by the way? Is it just a really old model?)
Aside from all that, it can just be darn hard to remember what setting you used. Oftentimes for me, I kept going til my sheet was big enough for whatever it was I was covering, without regard to how thin it ended up.
Just in case you ever find yourself in the same boat, here's a quick project that may help you tell (after the fact) what setting you used. It can also be useful for comparing two different machines &mash; for example, to help tell your friend with a Makins machine what setting she should use to match your Atlas's #2 setting. Or if you're trying to plan a project that requires a specific thickness, you can use these disks to find the perfect one.
Materials
- polymer clay
- pasta machine
- cookie cutter
- number rubber stamps or needle tool
- drinking straw for poking hole (optional)
Instructions
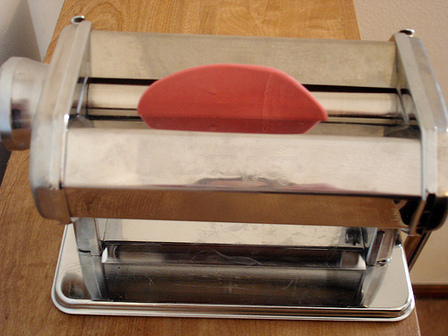 Condition clay. Roll it out to the thickest setting of your pasta machine.
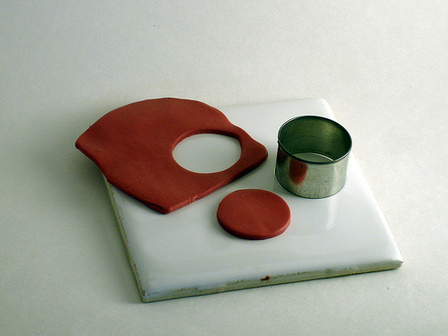 Use a cookie cutter to cut out a disk from this setting.
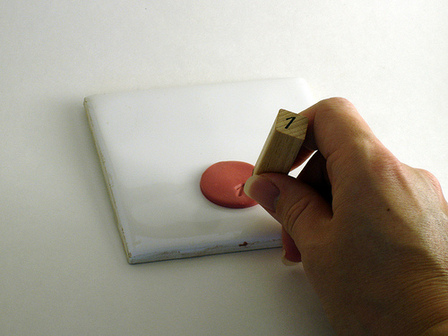 Use a number stamp to mark it with the number of the pasta machine setting this disk matches up to. (If you don't have number stamps, you could carve the number with a needle tool.)
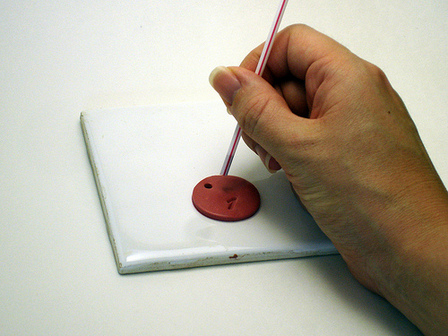 Repeat for each setting on your pasta machine. If you want, you can poke a hole in the corner of each disk before baking. After baking, thread book rings or yarn through the holes to keep the disks together.
Extra Tips
- If you're making several cheat sheets, use a different color of clay for each pasta machine to avoid any mix-ups. Use a Prismacolor marker to write the brand of the pasta machine on the back of the thickest disk.
- If you need to have accurate measurements, you could write the actual thickness of each disk on the back with a marker.
Now when someone asks you what pasta machine setting you used, you can just compare your project's thickness to each disk til you find the right one.

Comments
What a good idea!
Posted by: intothedawn | August 5, 2009 2:56 PM
What a great idea! Thanks for sharing. By the way, I used your idea for the extruder Disc cheat sheets some time ago. Will have to post on my blog sometime on what I did with it.
Posted by: 2 Good Claymates | August 5, 2009 10:22 PM
i've done the same thing. nearly exactly! when i got my new machine, 9 was the thickest. so i needed to compare back to my atlas. great minds think alike!
Posted by: gerri newfry | August 6, 2009 2:10 AM
Very clever. These numbered tags could be used in a variety of ways.Numbered tags could be uesde to indentify process steps as well.
Posted by: sguyot | August 6, 2009 7:29 AM
This is brilliant! I don't even do that much poly clay and I totally want to make one of these.
Posted by: Sister Diane | August 6, 2009 8:35 AM
I'm glad I'm not the only one who doesn't have an Atlas! Those are really cute little chips...
Posted by: Rachel | August 6, 2009 1:02 PM
Thanks all for your comments!
2 Good Claymates: I look forward to seeing what you did with that extruder disk cheat sheet!
gerri: Same reason I had to do mine. Necessity is the mother of invention and all that, eh?
sguyot: I love this idea. Might make my photo shoots a little easier if I laid them all out with numbered tags.
Sister Diane: You totally need one... cuz you totally need to be doing more polymer clay! :-)
Rachel: My Atlas machine was actually the reason for this project... or rather the fact that I got a new pasta machine (to be reviewed soon) that I need to compare to my old Atlas.
Posted by: Angela Mabray | August 7, 2009 2:58 PM
Wow, that is a spectacular idea! Just tried it out and I know it's going to save me a bundle of time (and prevent those "let me make sure it's the right size" tests I do each time. Thanks!
Posted by: Joel | December 6, 2009 3:03 AM