
How to Make a Polymer Clay Button Wreath
I love the vintage button wreaths I've been seeing on Flickr. But what if you don't have enough vintage buttons in coordinating colors? Or perhaps you're like me and you're unwilling to commit the buttons you do have...?
Polymer clay to the rescue!
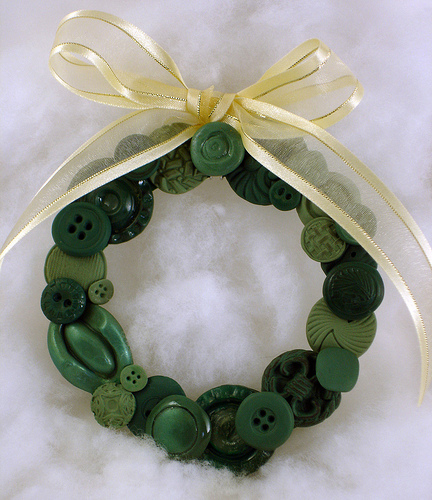
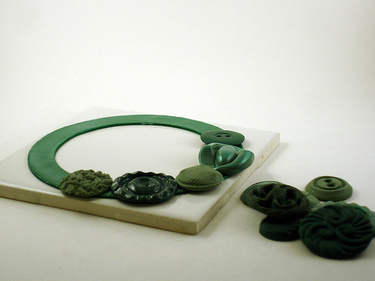
I used mold putty and polymer clay to put together this monochromatic button wreath. Of course, there are unlimited possibilities — using different colors of buttons, different shape bases, etc. And hey, if you've got almost enough real buttons to make a wreath, you could just use these steps to fill in the holes with some color-coordinated polymer clay buttons. Here are the basics to get you started.
Materials
- Amazing Mold Putty
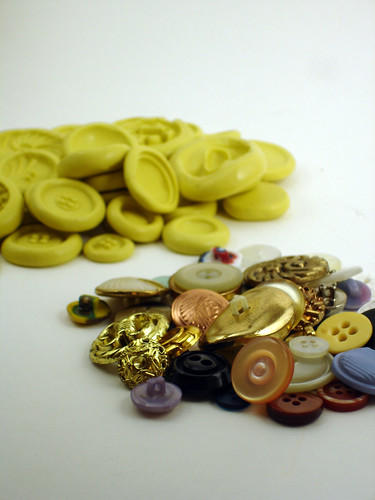
- buttons for molding
- polymer clay in your choice of colors
- either liquid polymer clay OR a hot glue gun
- clay blade or needle tool
Instructions
- Make button molds. Use Amazing Mold Putty and whatever buttons you have on hand to make button molds. Try to include several different sizes of buttons, since even the smallest buttons are great for filling in the gaps in your wreath. For instructions on making and using button molds, check out these links:
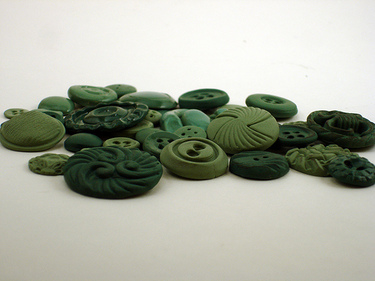
- Make buttons. Once the molds are set, press conditioned polymer clay into the molds to make your buttons. A few tips:
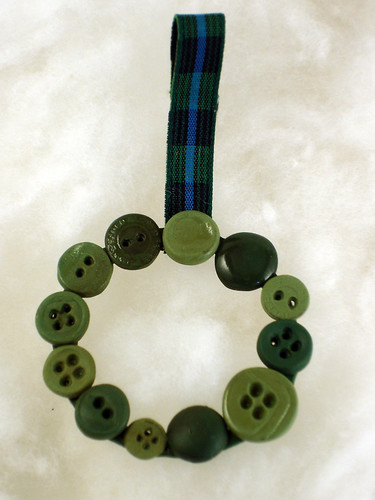
- The number of buttons you'll need varies based on the button size and the size of your wreath base. To give you a general idea, though, I used 26 buttons on my large (4") wreath and 12 buttons on my small (2") wreath. It's a good idea to make a few more buttons than you think you'll need.
- While it's fun to have the different shapes, textures and sizes of different buttons, you can just use the same one or two button molds for the whole wreath. Try using different colors of clay with one button mold for a simple, coordinated look.
- If you're going for a monochromatic look, start by mixing up a color of clay you like. Make some of the buttons from that color, but then vary the shade by adding some white or black clay. I made 3-4 shades of green for my wreath this way, and I think it gives it a little more interest.
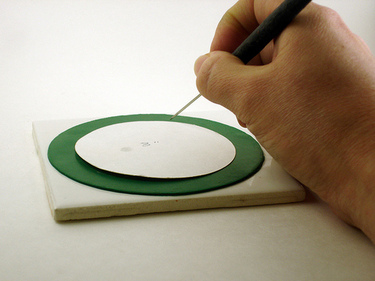
- Make a wreath base. I rolled out my clay to a medium thickness on my pasta machine. I put that sheet on my baking tile, since it would be difficult to move without distorting later. I then used 2 paper circle templates to cut out my wreath: a 4" template for the outer circle, and a 3" template for the inner circle. Of course, you can make your base any size or shape. I've seen some gorgeous heart-shaped button wreaths that would be great for Valentine's Day.
- Assemble the wreath. This is the fun part! Add your buttons to the wreath base. Start with larger buttons first, then fill in the spaces with smaller buttons. Move 'em around til they look good to you, then stick 'em down. There are a couple of options for gluing everything together:
- I left my wreath base from the previous step un-baked, then put down a layer of TLS to act as a glue between the base and the buttons. Remember that TLS only acts as a glue between baked and unbaked clay (not baked to baked). So when I needed to stack buttons, I first added a thin sheet of unbaked clay and used TLS to "glue" it to the previous layer.
- Another option would be to bake everything (base and buttons), then use hot glue for assembly. This might be a faster option, depending on how many times you have to stop and bandage your burned fingers. (Or maybe that's just me!)
- Add your finishing touches. If you still have part of your clay that's un-baked, bake it now. I used Future on a few of my buttons to give extra shine here and there — I liked how that gave it more variety. Finally, add a nice coordinating ribbon and hang your wreath!

If you make a polymer clay button wreath, I'd love to see it. Be sure to leave a link in the comments. In the meantime, check out these awesome button wreaths for inspiration:
- Rachael Herbert of Sweet Nothings posted a tutorial for her very cute Mini Button Wreath Ornament.
- From Flickr, check out button wreaths by little birds (monochrome red), Lin Moon (monochrome white), craftapalooza (red & white), and mikamika (retro brown & pink).
- And for more Flickr inspiration, check out these photo pools:
